Saturday, July 6, 2013

Table Top Dill Pickles...just like Klausen


The ingredients:  
2 c. cider vinegar
6 c. water
6 heads of dill
6 cloves of garlic
1/3 c of minced onion (dried)
1/2 c. canning salt
1/3 T mustard seeds
5-8 pickling cucumbers depending on the size


First, cut the cucumbers into spears.  I cut them in half, then in half, and then in half.  :-)


 Then dice 6 garlic cloves into small pieces.  

Then pack all of the cucumbers and dill into the jar.  Boil the liquid (vinegar and water) and spices and the pour over the cucumbers and dill.  If the cucumbers aren't covered, pull a couple of spears out.  Put the lid on the jar and let sit out on the counter for 3 days.  During this time, turn it over occasionally to keep the liquid and spices mixed and equally covering the spears.  Once they're ready, refrigerate and ENJOY!!

FYI..this recipe used 6 of my 8 cucumbers.

Variations:  Next time I think I will add some red pepper flakes and hot peppers for a spicier/zestier version!


Credits:  I found the original recipe here:  


Tuesday, March 27, 2012

Spring Break Project

Today, Audrey and I embarked on a little project.  We headed to Hobby Lobby armed with a 40% off coupon.  We bought 1 foam ring, 1 roll of light green faux fur yarn, 1 pink ribbon (50% off), and some flower embellishments.  We walked out of the store with less than $10 invested and created this for the front door.  It was fairly easy (until the yarn knotted up).  I did find that there is a balance to wrapping the yarn...if you wrap it too tight, the fur won't poof out enough, but if you wrap too loose then you get lots of gaps where the foam shows through.  Play with it a few minutes to get the right tension.  Finally, we added the flowers with straight pins.  I want to add a "Think Spring" sign, but need to the get the Cricut out for that.  Until them, it hangs on the door welcoming all the visitors.

(I did see this originally on Pinterest...Lord knows I can't come up with these creative ideas on my own :-)

Sunday, January 29, 2012

Pinterest Inspired...YouTube Taught

So, as I mention in my previous post, I have found Pinterest very inspiring. One hobby that I decided to teach myself was knitting. After Christmas, I forced my family into a Hobby Lobby shopping spree where I bought my first set of knitting needles and several balls of yarn. I had no clue what I was doing or how to do it, but I was ready to learn.

That night went to youtube and learned how to cast on and do a knit and purl stitch. I stitched and stitched and stitched that night. Not long after, I began my first scarf. It was a good learning experience, but it is NOTHING that I would like to show here, but I did learn a lot about knitting.

For my second effort, I was inspired by this scarf: http://www.purlbee.com/easy-hand-knit-scarf/

I used 2 balls of Vanna's Choice yarn by Lion in Linen and 11 sized needles following this pattern:
Cast on 39 stitches.
K2, p2, repeat to last 3 stitches, k2, p1.
Repeat this row.

It turned out pretty good, for a second scarf. The first 20 rows are a little wonky as I was getting my gauge right and then a few rows after that I I had a major screw up (still not sure what) and it is visible. Overall though, I think it turned out great.

Audrey has been really excited about my knitting. She understands the difference between a knit and a purl and likes to sit and help me knit. When we were at Wal-mart, she found an eyelash yarn called Boa by Bernat and she wanted a scarf made from it. So, I made her one. I casted on 23 stitches and did a straight knit stitch all the way around.

I used just one ball of yarn (keep it mind it was for a child, an adult one would have needed 1 1/5-2). Overall, it hides a lot of flaws and is fairly easy to work with once you get the hang of it. It is so soft and I like it so much, I will be starting mine in a next few minutes.

Overall, this knitting thing is kind of fun and I am getting better each day. Can't wait to keep trying new and challenging patterns, stitches, and techniques. And to think...it all started with pinterest and a few youtube videos..oh and the desire for a challenge!


Sunday, January 8, 2012

Pinterest Inspired....

So, the newest wave to sweep the nation (well, at least my little corner of the state) seems to be Pinterest, a virtual pinboard for all of your cool web-finds.  I joined after Christmas and got inspired by all the cool stuff and ideas.  So far, thanks to Pinterest, I have taught myself to knit and today I completed my first project. If you know me very well, you know I am not a crafty girl.  Crafts are always a challenge for me, especially coming up with ideas.  That is why Pinterest  is so useful for me.   My first project is a DIY project:  Make your Own Coasters.


What you need:
-ceramic tiles like you would find at Lowes/Home Depot (about .20 a tile)
-modge podge

-scrapbook paper
-water based polyurethane


Next, choose your  favorite scrapbook paper and cut squares to fit on your tile.  You may want to leave enough room for an 1/8" border.  This will help with sizing. Use a scrapbooking paper cutter for easiest and most consistent cutting.  Obviously, you should cut all your squares ahead of time because there will be no time once you start gluing.


Then, wipe all of your tiles down.  If there is gunk on them, wipe with alcohol.  With a cheap chip brush or foam brush, brush modge podge on the tile completely covering the whole tile.  Be sure not to have any glops.  Place the tile on the tile, smoothing it down on all edges and in the middle.  Be careful to work quickly because modge podge dries quickly.  Afterwards, put 2-3 coats on the top of the tiles.  Make sure brush strokes are in the same direction each coat and be sure to use even coats.


After the modge podge has thoroughly dried.  Coat with water based polyurethane.  After an appropriate drying time, you can add bases so they don't scratch up tables.  You can either cut felt or buy those stick on felt feet or rubber bumpers.   Then you're done.  They make great gifts and I plan to make a little store to give away throughout the year and at the holidays!!  

 Before top coat of modge podge:


 Completion!!


Saturday, December 3, 2011

Friday, August 6, 2010

Homeade Salsa

Today was  my dadvand I's annual salsa canning marathon.  Normally we do 2-3 batches and yield 12-18 quarts of salsa.  Today, however, we did 4 batches and ended up with 31 quarts!!  No batch is exactly the same and I will go through our process so you can get an idea of the "how-tos".  
Over the years we have experimented with this recipe from using fresh tomatoes to freezing them, but we have finally settled on using canned tomatoes and fresh garden peppers.  Fresh tomatoes slow down the cooking process because you have to spend an hour or more cooking them down and there is a likelihood of burning due to heat and sugars in tomatoes.  We have decided speed is necessary to get the quantity we want.
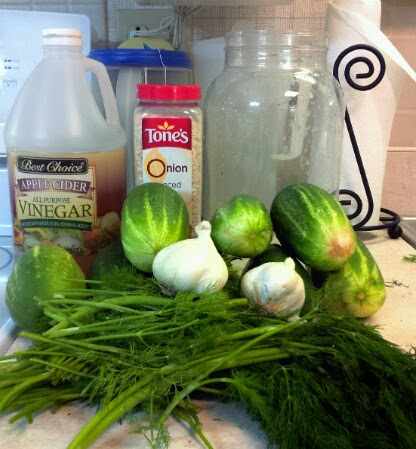
First, start with your ingredients.  Each batch will require,
*2 large cans (gallon) of crushed tomatoes (for a chunkier consistency consider using diced tomatoes, but stay away from using whole tomatoes b/c you will lose a lot of quantity in juice and it will be more work breaking them down).
*fresh hot peppers - quantity dependent on spiciness you desire (jalepeno, garden salsa, hot banana, habenero)
*2-3 fresh onions
*spices:  granulated garlic (NOT garlic salt), cayenne pepper, chili power -- again this is to taste
*salt and pepper
*Variations:  use fresh garlic, cilantro, cumin, or to keep pepper flavor without the heat de-seed and de-vein the peppers
    That's as specific as I can get because truthfully each batch is an experiment in developing flavors and playing with ingredients until we get the desired flavor.  There is a lot of taste testing along the way :-)

    So we start by emptying the tomatoes into the stock pot and bring it to a simmer.  As we wait for that, we get our pepper ready by cutting the tops off.  Many times, we use frozen peppers because pepper won't stay fresh long.  If they are frozen, we let them sit in the sink with warm water.  Once the peppers are ready, we put them in the food processor and chop them up.  Do be careful that you don't chop them too fine that they cook down to mush.  You want to had a little thicker consistency to the tomatoes.  I would say we add 4-6 cups of peppers per batch.  Again, depending on the heat and consistency you want the amount will vary.
    After you add the peppers, it is time to add the spices.  We start slow and work our way up to a flavor we're happy with.  I would say we use anywhere from 1/8-1/4 of a cup of each of the spices.  The salt and pepper are to taste.  If you want to add fresh garlic this the time to do it.  You will want to let it cook a little to infuse the flavor.  If you want to add cilantro wait until the very last minute or it will cook down to nothing and look kind of nasty in the final product.  After the peppers and spices have cooked, it is time to add the onions.  You don't want to add these until you are about to can because they will cook down to much.  If you add them at the end, they will add not only flavor but crunch and texture.

    After the onions have cooked for just a bit (less then 5 minutes), it is time to can.  Be sure to have the jars and lids in the roasting pan (yes I figured out the name to it) and boiling by this point.  Again, this recipe has enough acid in it that additional processing is unnecessary.  We've been canning exactly this way for over 20 years and we've never had a problem.    We're really careful about contamination, and my dad is the "canner".  He is very diligent about having less than 1/4" of head room and wiping the lip of the jar clean.  As you can see from the picture, it is a messy process--but the final product is worth it!

    Today's marathon yielded a monster 31 quarts!!! Batch 1 (7 quarts) and 2 (8 quarts) are pretty similar in flavor.  I would call them medium-hot.  Batch 3 (7 quarts) I would consider super spicy due to the habenero peppers we added.  Batch 4 (9 quarts) will give Batch 3 a run for its money in spiciness because we had so many left over peppers that we couldn't re-freeze so we just added them.  I don't think it will ultimately be as spicy, but it is going to be hot.    We also did that batch with 1 can of crushed and 1 can of diced tomatoes.  I think it definitely be chunkier consistency and thicker also due to the peppers.  The salsa making took about 4 hours from start to finish (including clean up) and this a short break to get more tomatoes and jars and have lunch.   My dad and I split up the the final product and it should last us until this time next summer :-).


    Saturday, July 24, 2010

    Hot Pepper Dill Pickle Relish

    So I am trying my hand at more canning.  I have had an abundance of hot peppers and pickling cucumbers, and I looked and looked for a recipe for a dill relish.  All I could find was a dill pickle relish, so I just started experimenting.  Here is what I came up with:

    Food Process the following:
    8-10 c of cucumbers (cut the ends off and cut into smaller slices for easy food processing)
    3 c of onions
    4 cloves of garlic
    4 c of assorted hot peppers (I used a combo of:  hot banana, jalapeno, garden salsa, and a red and milder version of a habenero called a zavory.  Be sure to remove the stems).

    Put in a large bowl and cover with a 3/4 a cup of pickling salt and water.  Top with some ice cubes for crispness.  Let sit for 3-4 hours.  Rinse thoroughly.

    In a large pot combine and bring to a boil:
    6 c of cider vinegar
    1/2-3/4 c of sugar (depending on your taste...I started with 1/2 but sprinkled in a little more to combat tartness)
    3 T of mustard seed
    1 T of celery seed
    1T of dill seed
    2 T of dill weed (dried spice version)
    1 T of red pepper flakes

    Add vegetable mixture.  Bring back to a boil for 15-30 minutes (depending on desired consistency).  I got 7.5 pints out of this recipe.  It seems good on first try.  In hindsight, I would definitely try to add more red peppers just for color.  I wonder what the difference would be if I used regular vinegar and not cider vinegar?  Overall, this is good relish with a kick.  I like the flavor and consistency.  I think if I make sweet pickle relish I will use this recipe and just add sugar and less dill b/c my other relish had too much turmeric.

    Sorry no pictures this time.  My darling photographer assistant is busy redoing our 1/2 bath.